
Setting up Sensorial
I love sensorial work. When I was having a hard day, I would put on a blindfold, get out the geometry cabinet, and trace until my soul settled down. And then, of course, the geometry cabinet was the hot item in the room!
Sensorial work is not meant to teach our children anything new. Instead, it's meant to help them make sense of the often overwhelming sensory information they have already experienced.

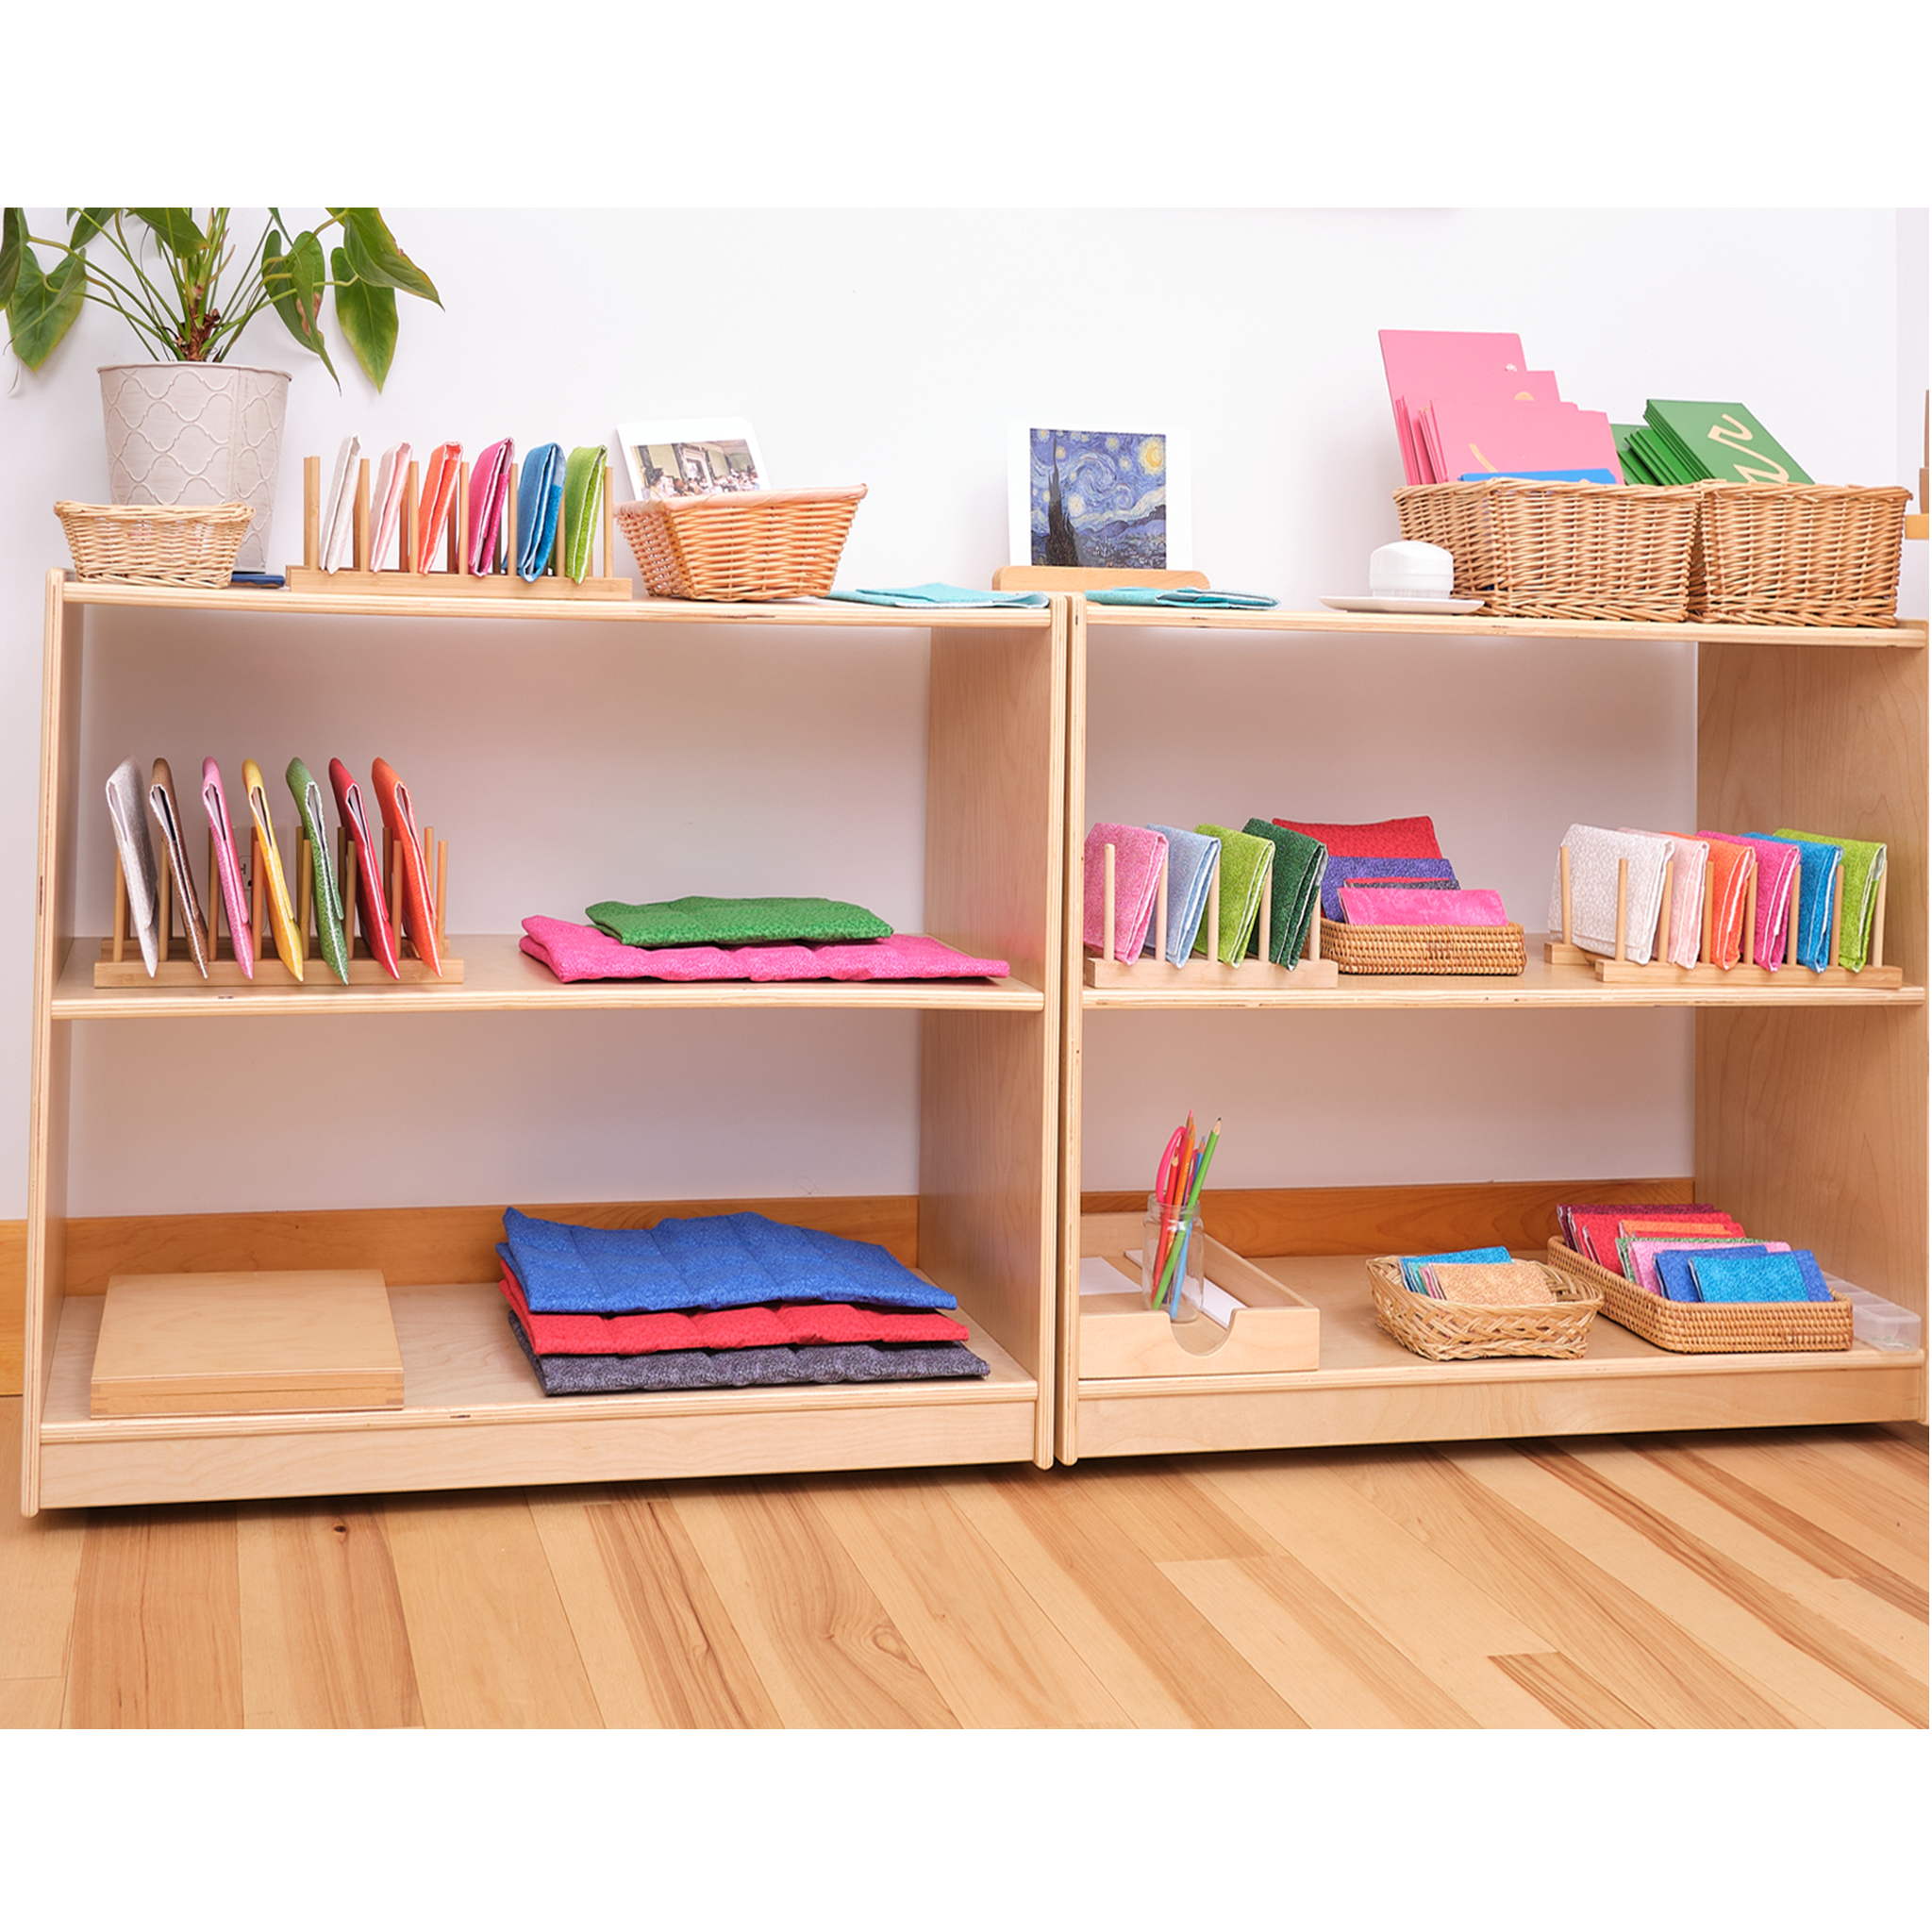
Our sensorial shelves should be organized in a logical fashion. Some people like to put all the visual items together in sequence from the earliest (cylinder blocks) to most advanced (large hexagonal box for the constructive triangles). Other people like to organize by age starting with everything a 2.5- to 3-year-old might be working on and then moving along in sequence based on what comes next developmentally. Many people have to take a combined approach to accommodate the varying sizes of the materials (e.g., there's no way that geometry cabinet can go on a high shelf).
What I describe here is only one possible way of setting up the sensorial area. I like it because it takes a primarily developmental approach to the materials. For me, when a child is ready for a lesson and I can't remember exactly what's next for them (I'm sure you never have this problem), I look to the shelves. The sequence of what comes before and what comes after should be built right in to the order of the shelves.
Shelf 1: Touch

What I love about this shelf is that it puts the complex sense of touch at the forefront...right where it belongs because touch is at the core of all other sensorial work (I'll have to write a separate blog post to give the details on why...tons of awesome neuroscientific, geeky stuff). Here's what's on the shelves:
- Finger sensitizing brush (use this before you do any tactile work to wake up the tactile receptors on the fingertips)
- Touch boards
- Fabric matching (start with 4 great contrasts of natural materials: wool, silk, linen, cotton; then do 4 great contrasts of other common materials; then do 4 types of one material like gradations of wool; keep them as close to the color and size as possible; rotate these every week or two)
- Mystery bag (contains only common objects...no new vocabulary)
- Blindfolded sorting (progressive exercises that vary in only one way...keep the color and shape the same if you are sorting on size; rotate often)
- Geometric solids
- Lovely cloth to cover the geometric solids
- Baric tablets (light, heavy, medium)
- Basket of blindfolds
- Thermic bottles (put these out every morning and take them off the shelf when the temperature is no longer distinct...maybe by 10:00 am)
- Thermic tablets
Shelf 2: Beginning Visual

You can move into this group of materials as soon as children have adequate experience working with the materials on the top row in Shelf 1.
- Cylinder blocks
- Pink tower
- Color box 1
- Color box 2
- Brown stair
- Geometric cabinet
- Cards for the geometric cabinet (although there is only one in the picture above, I'd prefer to have three of the wooden slot containers for the geometric cabinet cards: one for solid cards, one for thick outline cards, and one for thin outline cards; each slot matches the corresponding drawer in the geometric cabinet; with three cabinets, you don't need elastics)
Shelf 3: Visual Part 2

Whatever you do, don't move too quickly to this shelf. Make sure the children have boatloads of work with the geometry cabinet before you jump in here. Again, the order shown is based on what the children do before and after certain materials. While we often present the knobless cylinders near the cylinder blocks, these are presented at very different developmental ages. We don't actually need to show the children that they are the same. The children will figure it out...and then it will be THEIR discovery. Likewise, the large hexagonal box is used later and, therefore, does not need to be on the same shelf as the other constructive triangles. Here's what's on the shelves:
- Red rods
- Constructive Triangles: Rectangle box 1 (colored with black lines for controls)
- Constructive Triangles: Rectangle box 2 (all blue with no lines...this is harder than box 1)
- Constructive Triangles: Triangle box
- Constructive Triangles: Small hexagonal box
- Knobless cylinders: green, red, yellow, and blue (in that order...easiest to hardest)
Shelf 4: Older Sensorial Work

This is a mixed shelf that includes a lot of visual work but also sound, smell, and taste. Again, it is organized based on the developmental age generally associated with each material. Here's what's on the shelves:
- A plant (whose leaves match one of those presented in the botany cabinet)
- Binomial cube
- Trinomial cube
- Superimposed geometric figures (for concentric, tangent, adjacent, and inscribed)
- Sound cylinders
- Smelling bottles (I think the ones in the picture are actually too small for the nose to truly get the full body of the scent but we had to make due temporarily. You really want wider-mouth, short jars with metal lids. Paint the insides of the jars so they are opaque. Then, cover your lavender, mint, eucalyptus, and coffee with cotton so the children can't see what's down there when they open them up.)
- Tasting jars
- Paper cup supply for restocking tasting jars
- Spoon supply for restocking tasting jars (I like those little espresso spoons)
- Botany cabinet (on top are cuticle sticks for tracing the shapes and the matching solid, thick outline, and thin outline cards)
- Color Box 3
- Constructive Triangles: Large hexagonal box
Shelf 5: The Bells

When you think about the bells, remember that the green control boards that go underneath are designed to space the bells like the keys on a piano. The bells with the white bases go in the back on the green boards. The natural-based bells go in front on the white/black rectangles and are moved by the children for matching/grading activities. The white bells should stay put. If you really want your bells respected, be careful to present the first lesson first: how to carry the bell. The second lesson is carrying the bell, placing it on a table, ringing it with the mallet, and then muting it with the mute.
So that's everything. If you have other materials in sensorial, ask yourself why? Measure them up against that long list of criterion that make a Montessori material a Montessori materials (e.g., beautiful, self-teaching, self-correcting, isolates a sense). And more importantly, make sure they aren't trying to teach the same thing one of the other materials already covers. If you did nothing in sensorial but presented all the initial and follow-up presentations for the materials described here, all of your children would be very well served. If you add too much other stuff, the children won't have time to delve into the core materials in depth,... and your room will get cluttered (see the blog post on crowding the visual field for why you need to vigilantly avoid that).
Do you have a beautiful sensorial area? Send us some photos so we can all benefit from your knowledge!


11 comments
@V.Rajeshwari There are many training possibilities available. I recommend any course offered by the Association Montessori Internationale (AMI). They have a mixed in-person/online course running out of Texas I believe. The Center for Guided Montessori Studies (CGMS) also offers an online course with a limited on-site requirement. Do not trust most of the online courses as they will not present you with the information you truly need…do not compromise on your own education!
Julia Volkman
I want to be a part of learning this Montessori . Can any possibility are there by learning online.
V.Rajeshwari
Very beautiful. Thanks for sharing. We learned to put Red rods in a decorating way.
Tshering Sherpa
@Alexi: With just one child, you can certainly have only the materials that s/he is likely to be able to use out on the shelves. So having just shelves 1 and 2 to start makes sense. As the child grows, you will of course need to add in the materials that s/he will be ready for.
As you note, I would be wary about removing the earlier materials because there are so many connections the children make…like that the cylinder blocks have the same size cylinders as the knobless cylinders or that the pink tower cubes are the same size as the bead cubes, etc. That said, space is space and we all have to manage the best we can with what we have at the moment…with the vision of improving that in the long-term.
Maybe a solution would be to rotate the earlier items. So, you may have a space for a younger Touch item and for a week or two the fabrics would be there and then the touch boards and then the baric tablets. Again, this is not ideal but you could try it and see how it works.
But I think your biggest priority is to get more children into your homeschool! The child needs to learn from other children, especially social behavior. And we grown-ups tend to interrupt way too much. If we have lots of kids in the room, we get too busy to muck things up too much! So, see who you can invite to join you.
Julia
Thank you for providing such detailed examples! I am setting up a home school room for what will be my 3 year old. Since I don’t have as much room as a classroom, do you think setting out – the first two shelves and then once i’ve seen the progression, set up the next two shelves with works?
Possibly removing some of the items from earlier? I understand the concept of keeping the earlier items out for repetitive use even when they are older… just hoping to get your thoughts!
Alexi
@Renata: Thanks! I love having everything in order by developmental age with prerequisites coming earlier on the shelves. Otherwise, it is so easy to inadvertently miss giving important lessons. Let us know how it goes!
Julia
@Zahra: I think many people receive that instruction in their training but I can’t see a specific reason why it has to be that way (it wasn’t specified in my training). The child can see the algebraic progression from largest to smallest or smallest to largest. I think the bigger issue is your shelf… we put the largest prism in the corner so it would provide a control of error when the children put it away.
Julia
@Deepa: You want the shelves to be ordered from left-to-right, top-to-bottom so if your shelves are longer, you’ll need to have longer sequences. Does that make sense? Check out our Sensorial Progression for ideas: https://cdn.shopify.com/s/files/1/0734/7437/files/Sensorial_shelves.pdf?12257683960520653578
Julia
This sequencing of the Sensorial materials is lovely! The logic of beginning with touch and then moving on based on what would be developmentally appropriate will really help with spontaneous lessons and also classroom management-I especially like the way the last Constructive Tiangle Box and Color Box III are on completely different shelves than the rest of their sequence. And the idea of separating the Knobbed Cylinders and the Knobless Cylinders is very interesting! I will be implementing these ideas into my environment for our Autumn Session; thank you!
Renata Faccioli
I LOVE that the sensorial area is so detailed and well- thought out – it ;s beautiful. What would you do if there is space for only 2 long shelves – would you combine 1 and 2 and then 3 and 4 with a sepearte one for bells? Thank you for your ideas and contribution to re-juvenating our minds as we start preparing ourselves for the new year.
Deepa Shreekumar
Totally beautiful. Thanks for sharing. We learned to put Brown stairs from the biggest to the smallest.
Zahra
Leave a comment
This site is protected by hCaptcha and the hCaptcha Privacy Policy and Terms of Service apply.