
Art in the Classroom
When we go to Montessori teacher school we are taught to have gorgeous examples of art throughout our prepared environment. But it's not just meant to look pretty on the walls! It's meant to actually bring culture alive for us and our children. And, I think most importantly, it gives the children inspiration and motives for conversation. Young children are just becoming masters of our language. They need opportunities to organize their thoughts and express themselves aloud. With art, this is easy to do because whatever they think or say about art, they can't be wrong,... it's art!

Susan Stephenson, AMI Teacher/Trainer and acclaimed artist, wrote a wonderful chapter about bringing art to life in the classroom in her book The Red Corolla. When I first read it, I found myself in the hammock all weekend until I was done, it is that good of a read.
In this post, I'll paint a big picture of some key activities. But, I encourage you to look to Susan's book to get more detail. You can also read our Cultural Album/Teacher's Manual for precise direction on using Art in your child's environment.
Museums
The first thing I have to say is to get yourself to some museums!! If you can't go in person, take virtual tours on their websites. Enjoy yourself as you learn about the artists, the art, and the language used in the art world. The more you are interested in and engaged with art, the more the children will be. Truth.
Art for your Environment
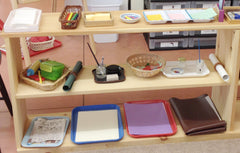
Next, get yourself some art to put out around the room. This doesn't just have to be paintings for your walls. It can be woven art on your pillows or rugs, doilies under your lamps/flower arrangements, small sculptures, etc.

For your walls, you can use our Fine Art Display cards or cut out the pages from old books of art from library sales or used art calendars. I had parents donate a few books to my classroom and we were able to rotate our wall art every month with the large cut out pages! Even if you start out with only a few pieces, keep the goal of having enough art to change things up regularly (aim for every season when you're first starting out or every month once you're going strong).
Remember that when you put anything on your walls, it needs to be hung at the child's eye level and with plenty of empty space between featured items. They've actually conducted research to show that classrooms with busy walls make it more difficult to focus/learn. So, less is more. (You can read all about this in our blog post called Less is More: Crowding the Visual Field.)
Conversations at a Picture

Once your walls are feeling museum-esque, anytime you and a child have a few moments, invite them to have a conversation about one of the pictures. Walk together to one that is likely to interest them. If you know the painting's name and artist, introduce it. But don't let this be the point of the lesson (no quizzes today; this level of detail comes with the fine art folders). Instead, look at the picture and ask questions to prompt the child to discuss what they see. Spark a conversation about it on whatever level the child is interested in. Model your own responses/ideas as part of a dialogue. You might ask:
- What do you think is happening in this art? What is it showing us?
- Have you seen anything like that before?
- Do you like it? Why or why not?
- How does this make you feel?
- Is there anything really interesting/beautiful/unexpected that you see?
- Would you like to create something like that?
Remember that there are no right or wrong answers. They are discussing art! Whatever it makes them feel or think is valid. Your job is not to correct their perceptions but to encourage a conversation where their ideas can come out. You want to get the children speaking so that they gain experience organizing their thinking and expressing it in a logical, intelligent manner. This is particularly important for children coming from situations where they may have limited opportunities to speak and/or limited exposure to vocabulary.
Making Art
Of course, with all of this exposure to gorgeous examples of art from around the world, the children are going to want to make art of their own! You can find full details about lessons on making art in our Cultural Album. But here's a short list of some key activities that tend to work throughout much of the US:
- Sculpting
- Drawing
- Standing chalkboard
- Crayons
- Colored chalk
- Paper work
- Tearing
- Cutting paper
- Cutting designs
- Folding a fan
- Joining
- Glue stick
- Wet glue
- Tape
- Stapler
- Hole punch & ring
- Painting
- Easel—one color
- Easel—more colors
- Watercolors
This is only a list to get you thinking; it's not a required curriculum. The specific activities you offer must vary depending on the materials you have available and the culture the children are living in. We want to offer them real art materials/tools that are child-sized but also relevant to their daily life. And, we want these activities to prepare them for future work. So, if we want them to make little books out of their handwriting work once they start writing, we can show them now how to make little books, even before they can write. Make sense?

Creating art empowers them in so many ways. First, it brings them into the moment (mindfulness) and develops their concentration along with their eye-hand coordination. They may also choose to use their art to make gifts or offer kindness to others. Think about how empowering this is for someone with a limited budget. Making art for others is a time-honored act of human generosity. Just remember that the art the children make is their art. They can choose to keep it, to give it, or to recycle it. It is not meant to be a "badge" to show others that they are good or that their teacher is doing something right. Susan Stephenson has helpful guidance on this point in her book The Red Corolla. Have I mentioned that I strongly recommend reading that?
When you prepare an art activity, remember to set it up so it can be done independently by one child. All materials should be on the tray, ready to use (no gathering things to get started). As we always do in the children's house, make your lessons precise and limit yourself to necessary language. Whatever you do, remember to practice ahead of time and have fun. Don't judge your results. Just enjoy the process of creating art.
Have your paper supply in one spot on the shelf with just enough on the tray to complete the activity (e.g., one piece of paper with crayons on the tray but a small basket of extra paper on the shelf). If you have scribblers who don't seem to be interested in what they're creating, limit the amount of paper available each day. Once it's gone, there's no more until tomorrow. Then re-present the activity and observe to see if there might be a different activity that would be of greater value for that child.
Fine Art Display Cards

Another way to bring fine art to life in your room is to create a displaying art activity. You'll need a nice variety of fine art cards (six is a good number to start with) and a container with the same number of mini-art easels. The mini easels should be sized to easily hold a single art card without it slipping off the front. Take the cards and the easels to a table and show the child how to choose a favorite picture, place it on an easel, and display it in a lovely location in the room. At the end of the day, collect all of the art and easels and put them back, ready for use the next morning.
This activity is often done only once each day by one child or a few children. This is another great feature of having only one of each activity in your environment. If they're dying to have a turn, the children will think about it ahead of time and make a beeline to the work first thing the next day to make sure they get their chance.
Fine Art Folders

The first fine art folders activity is similar to the work you do when discussing art on the wall. But, now the children are able to pickup, move, organize, contemplate, and just get their hands on the fine art. Think about approaching your art collections just as you would approach geography. We start with examples from every continent (World Art Display Cards) and then move to the child's continent and then expand back out to the rest of the world. Ultimately, you can create folders with classified art like a collection of landscapes, portraits, art by Gauguin or Monet, impressionist paintings, sculptures, metal-work, etc.
Choose about six fine art cards and place them in a lovely container (our large cloth pouches are one option). Take them to a work area and guide the child(ren) to take them out one at a time. Name the painting and artist and then guide the children to talk about what they see, what they like, what they don't like, what is curious, etc. You want to get things rolling and then, as soon as you can, fade away so that the children are chatting up a storm without you! Remember, there are no right or wrong answers: it's art!
When it's time to clean up, reinforce the names of the paintings and artists by saying, "Let's put the Mona Lisa by Leonardo Da Vinci away first. Now let's do the Starry Night by Vincent Van Gogh." This is a simple way to reinforce without testing/requiring. See what I mean? We want to make art inviting, not intimidating. (You can read more details about this in our Fine Art Cards Lesson Plan.)
Matching Fine Art Cards

Once they've had many opportunities to discuss the fine art, they are ready to play matching games with it. Now matching cards are not in everyone's Montessori training but it was in my AMI training back in the late 1990s. I still think these activities are incredibly valuable. They help children classify the things in their environment and organize like concepts. Matching cards also train the memory while simultaneously helping children refine their eye-hand coordination. So, matching cards are the next logical step after the fine art folders.
But, before you begin, make sure you've introduced all the names of all of the paintings and their artists; there should be no new vocabulary when working with matching cards. Why? Because the vocabulary creates context for the children and guides them to mentally "label" the images they see. (You can read more details about this in our Matching Fine Art Cards Lesson Plan.)
You can also use the Matching Cards or Fine Art Display Cards for writing activities with the movable alphabet or pencil and paper. Guide the child to choose a favorite painting and write about it. This is really a chance for them to solidify their expressive ideas.

3-Part Fine Art Cards

The 3-part cards show us how the fine art materials truly grow with the children. Once the children start reading non-phonetic words, you can revive the artwork they've grown to love at a new level.
Here, children learn the importance of both the painting and artist name when identifying works of art. Like all 3-part cards, these are really built to be a self-administered vocabulary quiz. The children layout the pictures and then have to read and match the correct word label. The control card helps them check their own work. This format is great for all kinds of vocabulary/reading activities.
3-Part Artists Cards

Okay, I have to fess up. I actually started making these 3-Part Artist Cards when I wrote my Montessori language album in 1998! It's embarrassing to admit that it took me over twenty years to finally finish this project. But, really, how else would you want to introduce artists to children than through their self-portraits? If self-portraits aren't available, portraits made during their life time or photographs of the artist are also good options.
As with all 3-part cards, be sure to use the photo-only cards first in 3-period lessons to make sure children know the vocabulary. Then, the 3-part format lets them independently test their knowledge.
You can read more about how to present these cards to the children in our Lesson Plan.
4-Part Fine Art Cards

Now here is where we stretched our thinking to add challenge for the learner. Once the children succeed with the 3-part Fine Art Cards, challenge them to test their knowledge with the 4-Part Fine Art Cards. Try these for yourself to see how much harder and fun it is to match the artwork names AND the artist names to each piece of art. You could break this out at your next dinner party, it's that fun!
Encouraging Material Making
Once your children see these examples of art cards, they may be inspired to create their own. This doesn't just have to be for art, it can be for anything at all that interests them. I had a student in my class who was fascinated with reptiles. So, he made a "parts of" the alligator 3-part card set. He drew an outline of an alligator and asked us to make some copies of it. Then, he cut those out and colored in the alligator's head on one page, legs on another, tail on another, etc. He wrote the word labels too. Now that is great work that ties together language, science, and art in one child-inspired activity. Perfect!

Another child I knew loved ships. So, when we had a ship in the phonetic object box, he borrowed it so he could make a sketch.

Remember that the purpose of this work is to help children develop their capacity and see that their efforts have value. Perfection is not required (although they might want it). So, we have to be careful not to criticize our own art work when we make it in front of the children. Even if we are quite unsteady with the drawing pencil, we can still create art that has value. And we can model evaluating the strengths in our art as well as things we'd like to work on.
I hope this has given you some concrete ideas for how to bring art to life in your environment. Really, the first step is to love it yourself, whatever your style. Then, share your passion with the children. If art doesn't call to you, no problem. It will call to your children as long as you value it, even if you are not passionate about it. Model with the children that it is important and they will follow your lead.
Please let us know how it goes for you with your children by leaving a comment below. Your words can be quite inspirational or informative for others. Your voice matters!


1 comment
A beautifully written piece! Truly highlights how art enriches learning and nurtures creativity in Montessori classrooms. Inspiring and insightful read!
Sudha Acadamey
Leave a comment
This site is protected by hCaptcha and the hCaptcha Privacy Policy and Terms of Service apply.