
Language Activities for the Unexpected Homeschooler
If you are looking for ways to help guide your child in the Montessori method from home, here are some quick and simple activities you can try. These should be of interest to children from around ages 3 to 6 years. Adapt your pace to match your child’s interest and abilities. Keep in mind that we always want the child to think that they are too smart for the work, not that the work is too hard for them. When they witness themselves succeeding, their self-confidence will grow.
Spoken Language Activities
 Recite poems together, rhyming or otherwise. Start with shorter ones and encourage memorization (try to memorize them yourself before asking your child to). Sing songs together. Recite tongue twisters and try to say them fast!
Read books together. Talk about the illustrations and just enjoy this time together. Repetition is a great joy for young children so don’t be afraid of reading the same books over and over again. While we love variety from our local libraries, going deeply into what you have on hand is also wonderful.
Play rhythm games by clapping, tapping, marching, etc. Do this with or without music. Add rhythmic chanting too.
 Look at the art in your home and ask your child what they think about it. What do they see? Do they notice certain colors more than others? Get them talking and expressing their ideas. With art, there really is no wrong answer!
Tell short true stories about your life. These should be only a couple of minutes long and be uplifting, fun tales like how when you were a child, your dog ate the turkey at Thanksgiving one year. Or, how once your cat was stuck in a tree and you used an open can of tuna to lure her down. Or, even something as simple as how you saw a woodpecker going up and down a tree that very morning. Keep these tales light, short, and sweet about your real daily life.
Walk around your house and touch and name three to four things. Give the item's full name like, “This is an oriental rug. This is the cement wall. This is the dining room table.” Then, walk to a chair, sit down and say, “See if you can find the oriental rug!” Repeat for all the items. If they go to the wrong one just say, “You found the dining room table!” Then walk around the rename all the items again. Don’t correct, just represent.
Play command games. Say, “Clap your hands then tap your toes.” Say, “Pick up your hat and bow hello.” You can have a lot of fun with this game.
 Collect classifications of things. Say, “Let’s see if we can find all the different kinds of spoons we have.” Walk together and gather one of each and bring them to your work area. Touch and name each one. For example, “Teaspoon, slotted spoon, serving spoon, soup spoon.” Then, ask the child to show you one. Say, “Show me the serving spoon.” “Show me the soup spoon.” Continue until you are confident that they know the names and then say, “This is too easy for you. Let’s make it more challenging.” Leave the spoons where they are and walk across the room together. Then say, “Bring me the slotted spoon.” When they arrive with the correct item, say, “You brought the slotted spoon! That’s just what I asked for. Put it back so carefully and come see me.” Continue for the others. If they bring the wrong one, just name it and say, “This is the teaspoon.” Walk back to the spoons together and rename each one. Try again another day. Don’t correct, represent.
Sounds Games/I Spy
This classic game is of great interest to the young child because it teaches what they really want to know: how to hear all the sounds in our language. In a systematic way, we help them train their ears to hear every sound a word makes. Here's how.
Stage 1: “I’m thinking of something that is on your foot that starts with the sound shhhh.” Wait for it. Say, “shhhhh” again and before long your child will say the word “shoe!” Now they know how to play the game. Repeat it for other very obvious things so they can’t fail.
 Stage 2: Another day, ask them to walk around the house and gather some objects with you. Choose objects that have different beginning sounds like book, spoon, key, napkin, plant, etc. Put this all together on your work area. Touch and name each object and then play the game. “I’m thinking of something on this rug that starts with the sound nnnnnn.” Wait for it. Repeat the nnnnn sound. Give hints by putting your hand right next to the napkin if you need to until your child says, “Napkin!” Repeat for the other objects. Continue for as long as your child is interested (they love repetition). After a couple of days, encourage them to be the leader.
Stage 3: After a week or so of repeating stage 2 every day with different objects, say, “Today I’m going to show you a new way to play the sound game!” Gather your objects (don’t worry about different initial sounds for this stage) and place them on your work area. Touch and name each object. Say, “I’m thinking of something on the rug that starts with the sound sssssss and ends with the sound nnnnnnn. Starts with ssssss and ends with nnnnnn.” Wait for it. Repeat the sounds if you need to. If they’re still stuck, put your hand right next to the spoon until they say, “Spoon!” Repeat for the other objects and continue for as long as your child is interested. After some time (maybe minutes or maybe days depending on the child), encourage them to be the leader.
Stage 4: After a week or so of playing stage 3 every day, show them a new way to play. “I’m thinking of something on the rug that starts with the sound mmmmm, ends with the sound eeeeee, and has the middle sound uh.” Repeat as needed until they get “money”. Say the sound slowly so you can hear all the sounds. Continue for the other objects saying initial sound, ending sound, and then middle sound (yes, this is out of order on purpose). Repeat as much as the child wants to.
Stage 5: After a while of playing stage 4 every day (once it is easy for them), show them a new way to play. Repeat as in Stage 4 but try to find objects with long names like umbrella, elephant, and spatula. Say “I’m thinking of something that starts with the sound uh, ends with the sound uh, and has the middle sound mmmmm.” Once they find the umbrella, say, “Let’s see if we can hear all the sounds in this word, u-m-b-r-e-l-u.” Help them as needed to segment the sounds/identify each sound in the word.
You can read more about this activity in our blog post on the sound game.
Vocabulary Enrichment: 3-period lesson
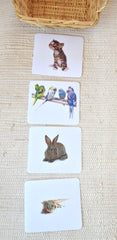
Start by naming everything in your home using the 3-period lesson (described below). Then, branch out to vocabulary cards. You can make your own from photos in magazines/from the internet or purchase some here.
 Period 1: Touch and name the object. For example, touch the sink and say, “This is the sink” Repeat for two or three objects like soap, paper towels, and stool.
Period 2: Ask the child to identify the objects we name. Say, “Can you point to the paper towels? Can you stand next to the sink? Can you find the soap?” It is during this second period that most learning takes place. Spend lots of time at this stage. Do not move to Period 3 until you are confident the child knows the answer (we never want them to feel stupid).
Period 3: Point to each object in turn and ask, “What is this?” This is the most challenging part of the lesson because the child needs to find the correct word from all of the hundreds or thousands of words s/he knows. This is much more difficult than pointing to the right object when the vocabulary is provided and there are limited objects from which to choose. Don’t move to Period 3, which is a kind of test, until you are 99% sure they will get the answer right.
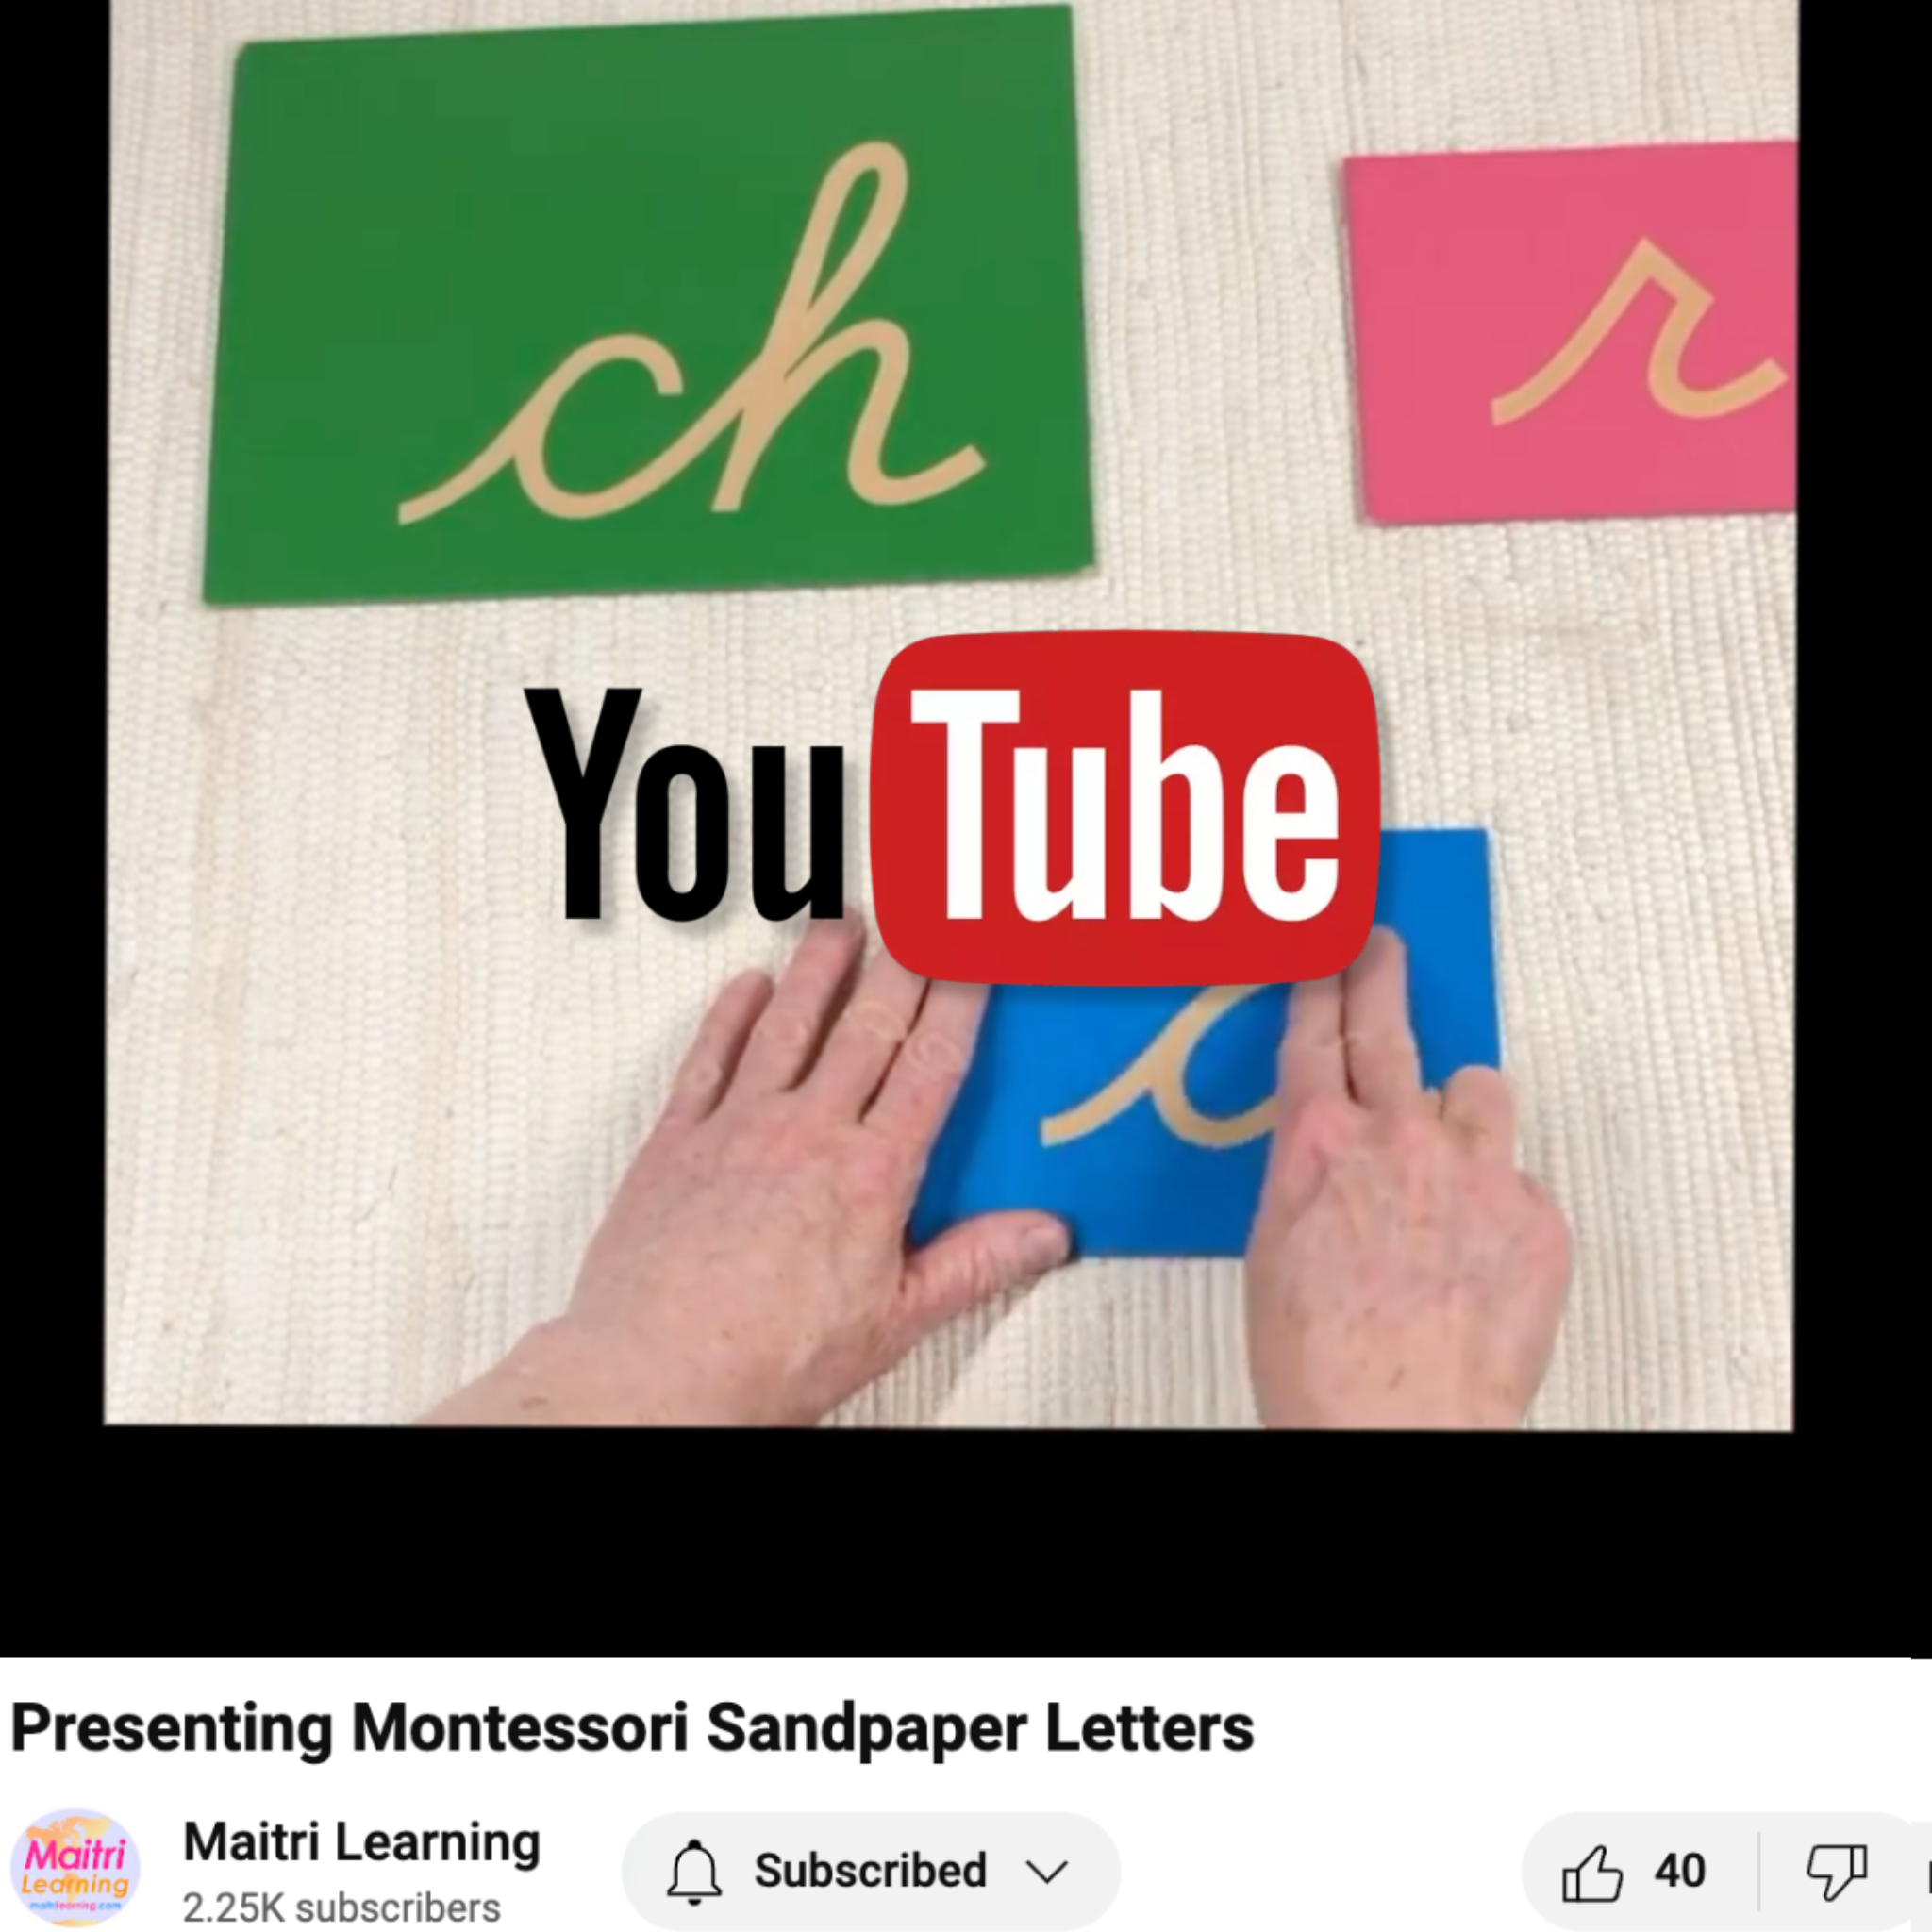
Learning Letter Sounds
If you have the Red Letter Alphabet Book or some type of tactile alphabet letters (like the sandpaper letters), trace those and name the sounds as described below. If you can make your own sandpaper letters, go for it! If not, try the sand tray activity that follows.
Take a brownie pan and fill it with about 1/2” of sand. If you have a movable alphabet (you can download one to make here; choose the font that your child uses at school), have that in front of you for this activity. Tell them, “You can learn the sounds of every letter in this box! We’ll do a few every day. I’ll show you how.” Choose one letter and place that card just to the left of the tray. Say the letter's sound, not its name (don’t say beee, say buh). Then, draw the b in the sand. Gently shake the pan to smooth the sand and begin again. Do this a few times, always repeating the letter’s sound as you draw (repeat the sound a lot). Give your child a turn. Continue for two or three more letters based on your child’s interest.
Once you’ve each drawn your three or four letters for that day, place those letter cards in front of the child and conduct a 3-period lesson. Point to each one and say its name. Then ask your child to, “Show me the buh.” If they can’t find it, put your hand right next to it to give them a hint. If they make a mistake, say, “You found the mmmmm! That’s a great letter.” Then, name each letter’s sound again. You can try the “show me” game again the next day. Don’t correct, represent.
Encourage your child to repeat this every day. To keep the level of challenge just right (not too hard, not too easy), try repeating one or two letters on the next day and adding one or two new ones in.
You can read more about the sandpaper letters in our blog post on phonograms made easy.
Building Words (Phonetically)
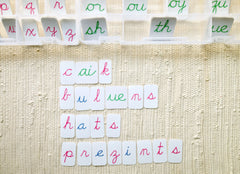 You’ll need a movable alphabet for this work (many children can spell words with alphabet letters long before they can write those same letters with a pencil). You can download a movable alphabet here (choose the font your child uses at school). Follow the lesson plan included in the download to encourage your child to write stories about whatever interests them. Don’t worry about accurate spelling. Phonetic spelling (like wuz for was) is a normal developmental stage that lays the groundwork for learning the innumerate spelling variations of English.
You can read more in our blog post on the movable alphabet.
Labeling Everything
 Once your child is reading/writing basic phonetic words, they will love to write down and label the names of things in their environment. You can use a pad of sticky notes or loose slips of paper (tape can be helpful) for this work. Say, “I’m thinking of something on your body.” Then write down the word “leg” on your sticky note. Give it to your child and say, “Put this where it goes.” They should stick it to their leg. How fun! Continue for other parts of the body (lip, arm, neck, chin are pictured) or objects nearby that have phonetic spellings like rug, cup, clip, etc. When they are done, gather all the slips and show your child how to put them together to make a little book of their very own. Encourage them to get crafty and elaborate with the book making. These can be quite lovely.
On another day, encourage them to label specific areas in the home, all the parts of a favorite game, all of the pet supplies, etc.
Function of Words/Grammar
 If your child is already a solid phonetic reader, check out our grammar activities. You can make most of these activities at home by yourself by handwriting slips. Read the lesson plan and figure out what you have in your home that is readily accessible to your child. A key part of this approach (from the London AMI teachings) is to engage the child with the environment itself. We empower them to collect items when possible so that they begin to feel like they have a connection to (and responsibility for) the world around them.
The above is by no means an exhaustive list. There are many other possibilities but the activities listed here should be of interest to young children of all ability levels. Don’t be afraid of repeating things every day. Repetition is a human tendency that is very strong in the young child. It helps them go deeply and innately learn whatever is at hand.
I hope this is useful. If you'd like to read more about the Montessori early childhood language program, check out our article on Language Development. Please add your ideas and your experiences in the comments below. It takes a village!


2 comments
@Floyd: Thanks! I am inspired by great colleagues like you.
Julia Volkman
Great article. Perfect for our parents at this time. Julia, you are so creative.
Floyd Creech
Leave a comment
This site is protected by hCaptcha and the hCaptcha Privacy Policy and Terms of Service apply.